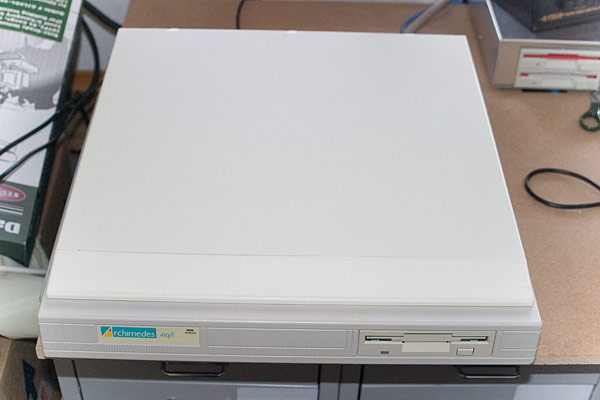
Archimedes A410/1 ARM2 to ARM3 upgrade
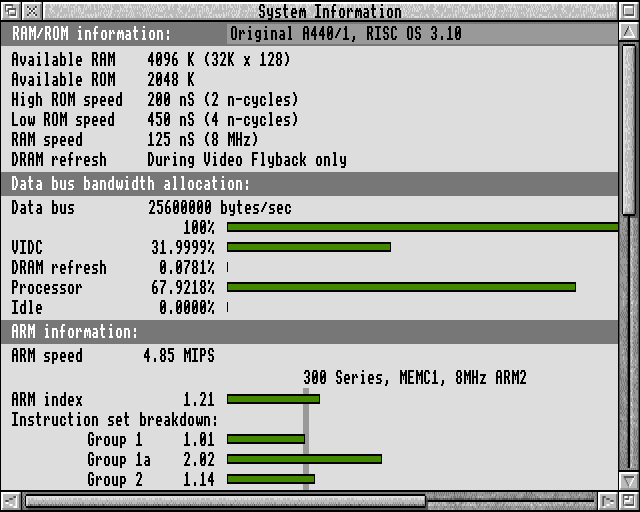
The ARM processors were always significantly faster than other processors of the same age and price range and the ARM2 processor fitted to the Archimedes range of computers was no exception. As you can see from the screenshot below, the ARM2 processor delivered around 4.85 MIPS. As time went on though, the ARM2 processor was eclipsed by other processors including the ARM3 processor which could be retro-fitted to the Archimedes computers delivering a significant increase in performance.
The first thing to do is to remove the cover from the Archimedes. This is done by unscrewing the 5 fixing screws located on either side and the back of the case and then sliding the cover backwards away from the Archimedes. Check out the battery maintenance video to see how the case is removed.
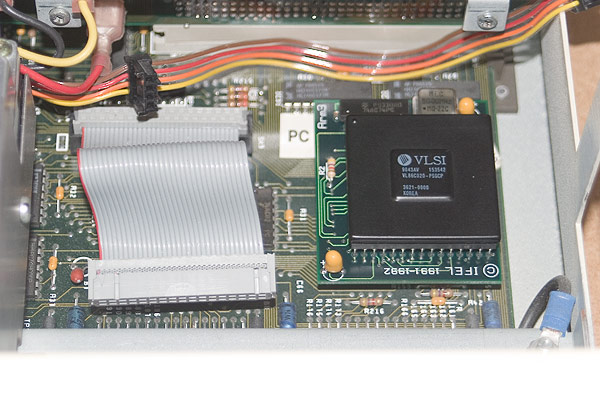
Once the cover is removed, the floppy drive needs to be unplugged and the drive and its mounting frame can then be removed thereby exposing the ARM2 processor. The floppy drive mounting frame is held in by a single screw on either side of the frame. If a hard drive is fitted as is shown in the picture below, a magnetic screwdriver will be needed to extract the screw located between the hard drive and the floppy drive.
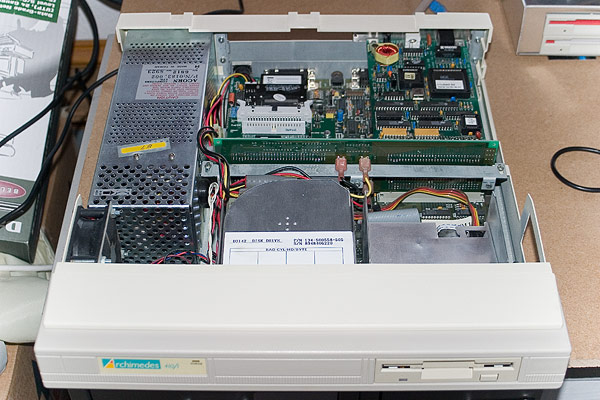
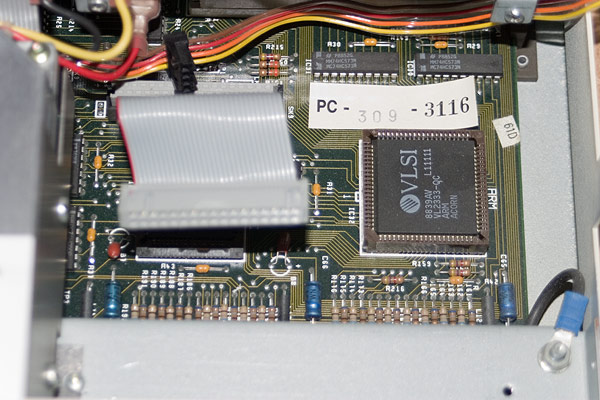
Once the floppy drive is unplugged and removed, the ARM2 chip is revealed.
Here's the ARM2 chip mounted in its socket in detail. Pin 1 is on the centre left of the chip as it is mounted in the photo.
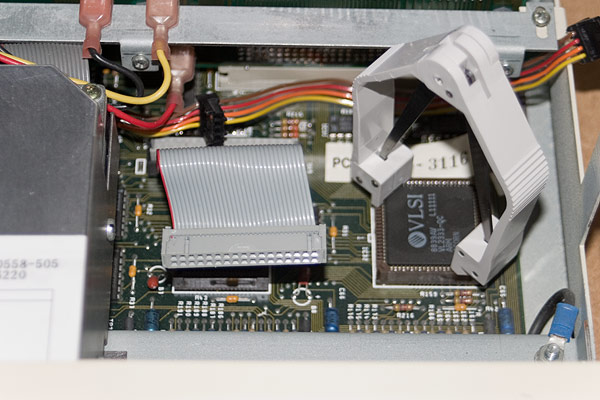
To remove the ARM2 chip, a PLCC chip extraction tool can be used as pictured below. Attempting to extract the chip with any other tools will more than likely result in damage. Even with the correct tool, the chips are a tight fit and require quite an amount of pressure to pop them out.
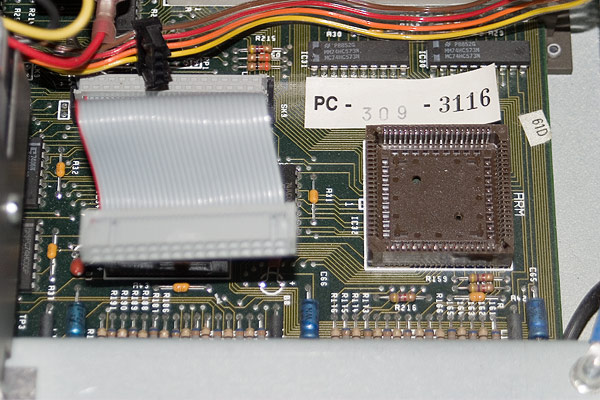
But pop out they do revealing the ARM socket and its pins, ready to accept the ARM3 daughter board.
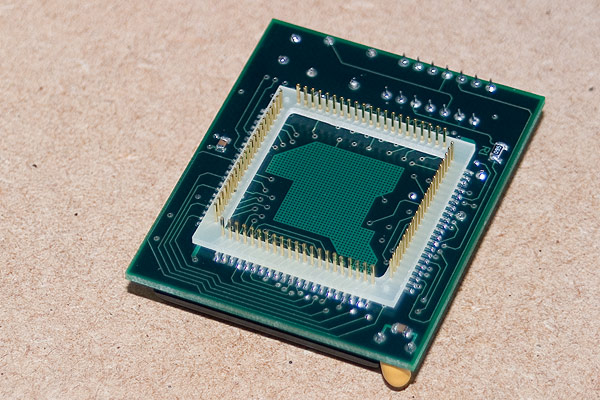
The IFEL ARM3 daughterboard mounted on some dissipative foam ready to be installed.
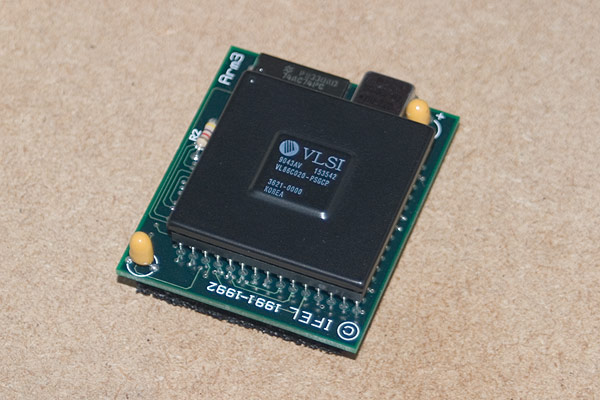
Here's another shot of the ARM3 daughterboard. As you can see, the pins are quite fine (but they are sturdy). However, when fitting the daughterboard, care should be taken to ensure that the pins are aligned correctly as quite an amount of pressure is again required to push the daughterboard home into the ARM socket. This is trickier than it sounds as it's difficult to judge the pin locations as the board itself obscures the socket but the further fitting hints document that accompanies the upgrade provides some useful tips.
Finally, the ARM3 daughterboard is fitted and reassembly of the Archimedes can commence in reverse order, fitting the floppy drive and then refitting the case before connecting a keyboard, mouse and monitor to test with.
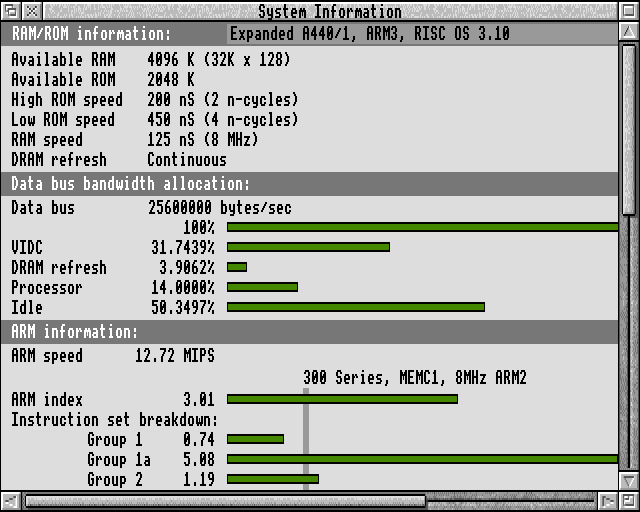
Once the Archimedes has booted up, !Si can be run again here showing the ARM3 is being detected and is delivering 12.72 MIPS.
Translate this site
IFEL ARM3 Resources
- Fitting instructions (ARM3/ARM3+FPA)
- Further fitting hints (ARM3 only)